Compact builds shine when materials and weight are chosen with care. Paul Butler proved this with a custom unit for a Toyota Tacoma that weighed just 380 pounds empty. That figure is far below many commercial options and helped him average 19–21 mpg on long road trips across Montana.
Good construction early on sets the tone for years of easy maintenance and better fuel economy. Choosing lighter timber and engineered panels saves weight and opens up space inside a small van. This makes the interior feel cleaner and more open without extra bulk.
Builders can learn practical techniques and find detailed information at camper remodel ideas and on projects that cover plywood and epoxy construction.
This guide will help readers pick materials, manage weight, and plan maintenance so their rolling home stays bright, efficient, and ready for travel.
The Aesthetic Impact of Light Wood Camper Design
What Max and Delphine learned is that stripping out heavy finishes rewrites a van’s interior story. After removing over 200 kg of dark paneling from their Land Rover Defender 130, the small living area felt open and much brighter.
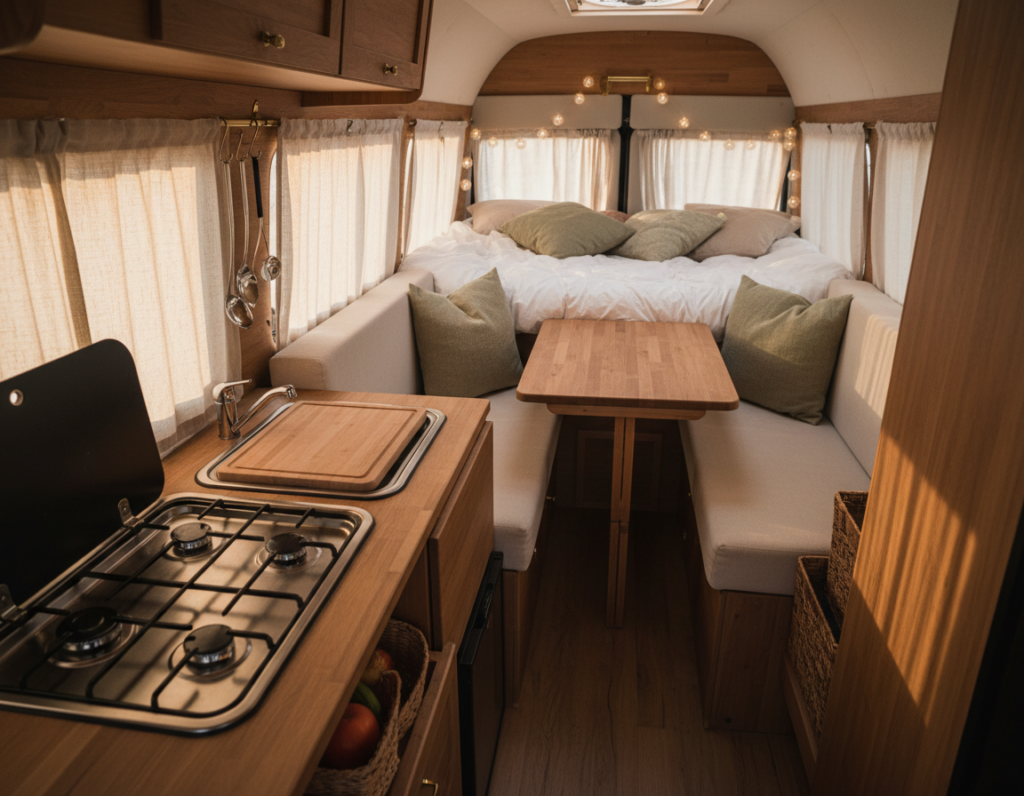
The color and texture of the wood chosen for walls and ceilings shape mood and perceived space.
Subtle grain and pale tones reflect more daylight and reduce visual clutter. That effect helps a van feel larger without changing its footprint.
Many builders save inspiration as cookies while researching finishes and layouts. These snippets help them compare materials and follow trends before committing.
- Removing heavy cladding can reveal hidden volume and improve circulation.
- Careful material choice keeps surfaces easy to clean and maintain.
- Consistent finishes tie storage, seating, and trim into a cohesive scheme.
Choosing the right materials is the first step toward a clean, inviting rolling home. Small changes in color and grain yield big gains for long-term travel comfort.
Selecting the Right Plywood for Your Interior
Plywood choice determines how well panels perform as flooring, wall, and ceiling surfaces in tight builds. The right boards balance weight, resistance, and finish so each section of a van stays durable and tidy.
Poplar vs. Hardwood
Poplar is often chosen for interior wall and ceiling panels because it offers a pale, clean look and cuts weight. It suits visible surfaces and built-in furniture where appearance matters.
Hardwood provides more structural strength for cabinetry and doors, but it can add mass that reduces fuel efficiency and usable payload.
Surface Finishes and Textures
Manufacturers like Garnica offer Ultralight panels that weigh about 12kg each, giving a strong strength-to-weight ratio ideal for flooring and panelling. Queenply-style faces give better moisture resistance than generic boards from a hardware store.
“Choose materials that keep surfaces stable under use and moisture — that saves time on repairs later.”
- Pick panels that balance resistance and finish for furniture installation.
- Use higher-quality surfaces where moisture is a concern.
- Accept cookies on manufacturers’ sites to view full product catalogs and specs.
Balancing Weight and Structural Integrity
Smart material choices let builders protect structure without adding unnecessary bulk. Achieving a stable, durable interior depends on matching low mass with proper support. This keeps a van safe on rough roads and improves fuel economy.
Insulation plays a dual role. Paul Butler used 1½” structural foam on all exterior surfaces to cut heat loss and stabilize interior temperatures. That layer adds thermal control without heavy framing.
The Role of Insulation Boards
Choosing panels and plywood with the right density matters. Queenply at roughly 330 kg/m³ weighs far less than standard poplar at 450 kg/m³, helping reduce total weight while keeping rigidity.
- Proper construction of furniture and wall panels ensures the structure resists vibration and avoids warping.
- Moisture resistance in insulation and boards prevents long-term damage inside the van.
- Many sites use cookies to run material calculators and show weight savings before construction begins.
“Select lighter, proven boards and detail joints carefully to keep load low and strength high.”
Moisture Resistance and Long-Term Durability
Moisture control is the single most important factor that decides how long interior panels stay serviceable. Builders with decades of experience stress that a waterproof bond prevents delamination and rot over years.
Queenply panels use PUR hotmelt glue, a waterproof adhesive widely used in yacht work and in van interiors. That glue helps plywood and boards resist water and keeps surfaces stable under regular use.
Paul Butler, with over 40 years of boat-building experience, recommends waterproof glue like PUR hotmelt for long-term durability. Proper bonding reduces maintenance and keeps paneling intact through wet conditions.
Poplar-based panels treated with high-quality adhesive offer a low-weight solution that still resists humidity. Good materials and correct wall and floor installation protect the van from moisture damage for many years.
“Select bonded panels and installation methods that match the expected moisture levels and use patterns.”
- Choose plywood and boards rated for humidity to limit warping over time.
- Use waterproof glue and seal joints to reduce maintenance needs.
- Install wall paneling and flooring with attention to edges and ventilation.
Enhancing Small Spaces with Bright Finishes
Maximizing reflectivity and daylight yields usable visual space and reduces the need for extra electrical lighting. These moves improve comfort and keep overall weight low while preserving structural quality.
Maximizing Natural Light
Install practical daylight openings. Paul Butler fitted a 19 x 19 overhead marine hatch to bring ventilation and direct sun into the interior. That single change brightened the van and cut reliance on cabin lights during travel.
Choosing Reflective Surfaces
Pick pale wall and ceiling panels with smooth faces to bounce light farther across the space. Reflective surfaces make floors and furniture appear larger and reduce hot spots from road-facing windows.
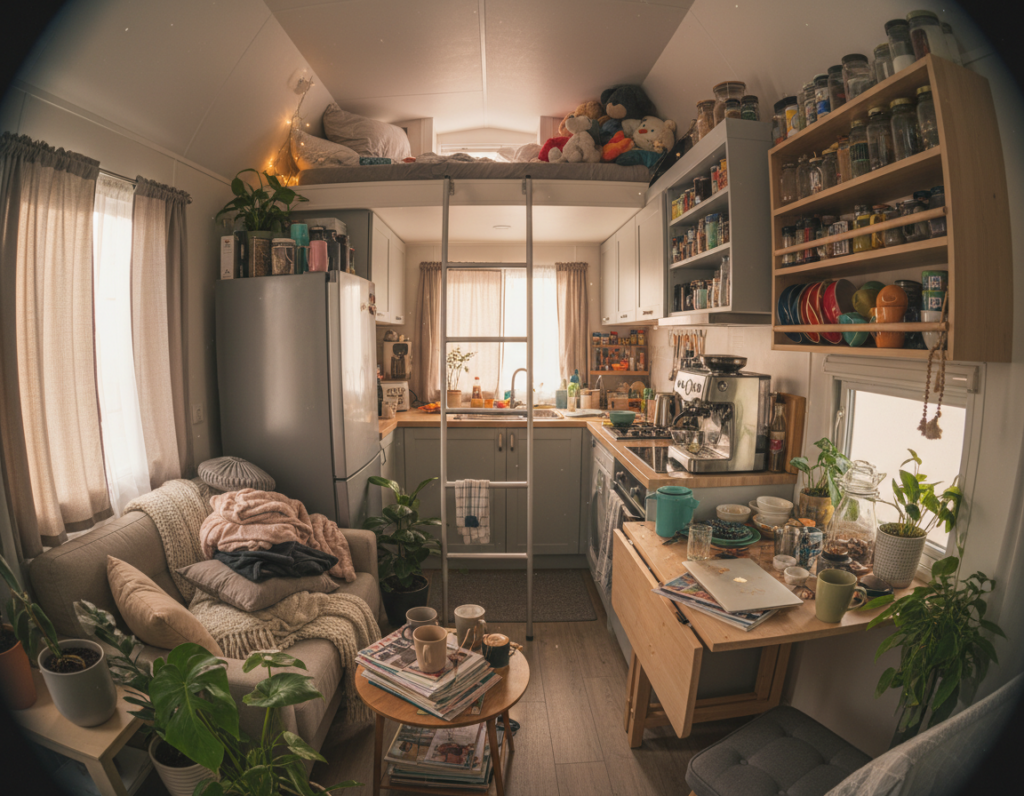
Creating a Cohesive Layout
Arrange light-colored furniture and flooring to spread heat and sightlines evenly. Hide high-quality insulation boards behind interior panels to keep comfort up without adding unnecessary weight.
- Overhead hatches boost ventilation and day use.
- Reflective panels extend visual space and improve moisture control.
- Thoughtful placement of doors and storage preserves every usable section.
Installation Tips for Professional Results
Careful cutting and fitting turn raw panels into a lasting, professional interior.
They should start each project by laying out all plywood panels and marking fast, clear lines before any cuts. Cut with sharp blades, then sand edges smooth for tight joins that hide seams and reduce gaps.
Use high-quality glue and moisture-resistant boards so furniture and flooring stay secure on rough roads. Seal every exposed surface to protect against water and maintain finish quality.
Paul Butler recommends reinforcing exterior corners with fiberglass tape to add structure without adding much weight.
- Fit poplar plywood where a bright, workable surface is needed for cabinets and wall panels.
- Pay attention to ceiling and wall installation so the structure resists vibration and moisture.
- Test-fit furniture and check alignment before final fastenings to avoid rework.
- Choose materials with good moisture resistance and follow manufacturers’ glue instructions.
“Detail work up front prevents leaks, squeaks, and costly repairs down the road.”
For real-world examples of complete interior makeovers, see a selection of proven projects at complete interior makeovers.
Conclusion
A thoughtful finish scheme turns a cramped van into a welcoming, easy-to-maintain home. The right interior choices expand perceived space and set the tone for long-term comfort.
Builders who balance weight, materials, and practical design create a camper that stays durable on the road. Years of experience show that good choices cut mass without sacrificing strength or surfaces that endure use.
Pay attention to quality and simple maintenance. This saves time and keeps finishes intact for many years of travel. Proper joints, sealant, and the correct wood panels make repairs rare and straightforward.
For more information and project examples, visit the website butlerprojects.com. Accept cookies if prompted to view full specs and build notes. Whether a DIY or a pro, careful planning is the best way to make a functional, beautiful home on wheels.
Take the time now — it pays back in durability, comfort, and miles of trouble-free travel.