The journey began in May 2017 when the author bought a used 2016 Ford Transit 250 named Casper. The total conversion cost for that van build was $3,480, and that figure shaped every decision that followed.
Transforming a cargo van into a livable space takes planning and patience. Many found the conversion was a large part of the trip, requiring a lot of creative problem solving and hands-on work.
This short guide shows the best way to organize a small camper van so each part of the interior serves a clear purpose. By the end, readers will see how to manage space, save time, and control cost without sacrificing comfort.
Every successful van conversion starts with a clear vision. That vision helps owners cut waste, speed the build, and finish the project on schedule.
Planning Your Camper Van Layout
Selecting a van determines how the floor plan and storage will fit together. He researched the Mercedes Sprinter, Chevrolet Express, and Dodge Ram ProMaster before settling on a Ford Transit for its reliability and fuel efficiency.
Measuring interior dimensions is a critical step. Accurate measurements save time and reduce cost by avoiding wasted materials and redesigns.
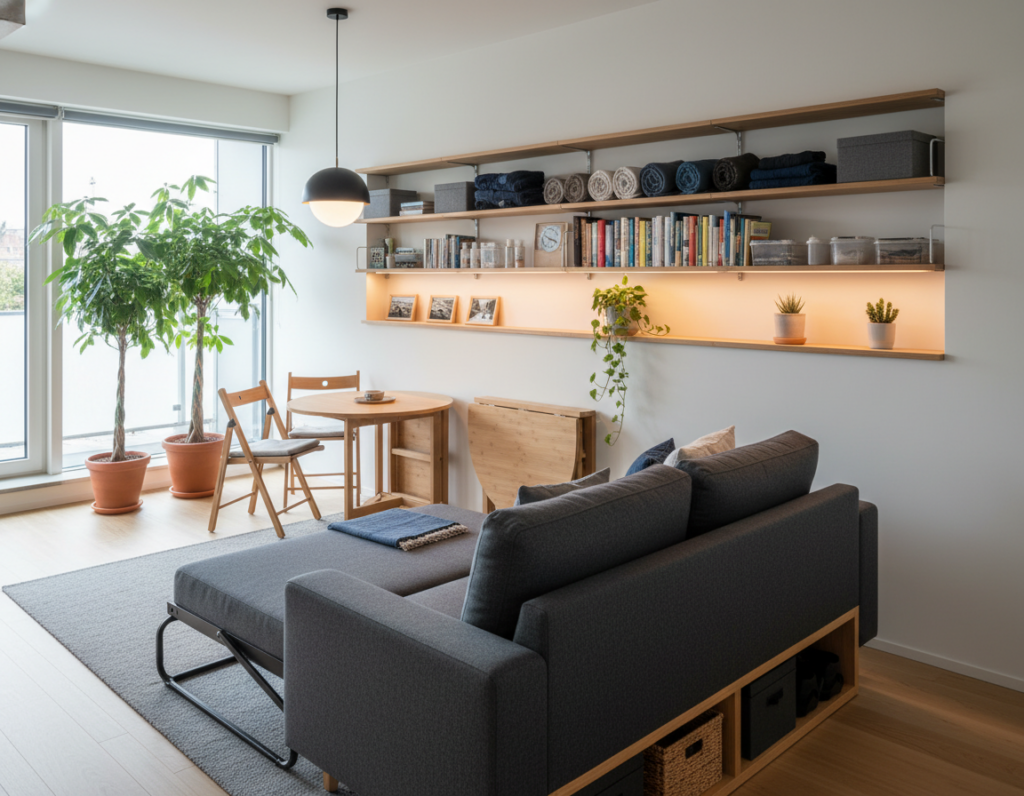
A smart layout considers every part of the vehicle. The floor footprint sets how much space remains for storage and daily activities. Organizing the side areas and using vertical zones keeps the interior feeling open despite limited square footage.
“Plan with tape and cardboard first—mocking up the floor is the best way to find practical flaws early.”
As a practical next step, readers can follow a detailed guide to plan a van layout. That resource helps turn measurements into a working van conversion design and clarifies each step of the process.
Essential Easy Camper DIY Organization Projects
A few targeted projects keep gear secure and the interior livable. These fixes take little cost or time but change how the van performs on the road.
Start with tension rods. He placed rods at shelf fronts to stop jars and bottles from shifting during travel.
This simple add-on proved vital during the build and later daily use.
Utilizing Tension Rods
Tension rods work well across open shelves and inside upper cabinets. They are a low-cost way to keep items in place and cut down on cleanup after bumpy drives.
Magnetic Storage Solutions
Magnetic strips and small plates hold metal tools, spice tins, and utensils on side walls. Mounting these on the side of the kitchen area frees floor space and speeds access to frequent items.
- Install rods to prevent shifting during the van conversion and later travels.
- Use wall magnets for knives, lids, and small metal parts in the kitchen.
- Focus storage on the side walls to keep the main floor open and usable.
Every step to secure gear saves time and frustration. For more compact solutions and linked inspiration, see camper organization ideas.
Maximizing Vertical Space with Wall Storage
Maximizing vertical wall space turned out to be one of the most practical moves during the van build. He chose wall systems to keep gear visible and accessible. This approach made a big difference in daily use.
Installing Peg Boards
Skadis peg boards were mounted directly to existing wooden panels. He screwed each board into studs and paneling to avoid creating a lot of new holes. That limited added work and kept the structure solid.
The peg boards gave flexible storage for tools, cooking items, and small parts. Hooks and baskets moved as needs changed, so the wall adapted with the conversion process. Using side wall space freed floor area and cut clutter.
- One smart step in the build was using modular boards to hang things by category.
- A well-organized wall saved time when he needed a specific item during the trip.
- This method reduced overall cost and kept the interior feeling larger.
Mounting storage on the side walls is a practical way to make every part of the van work harder.
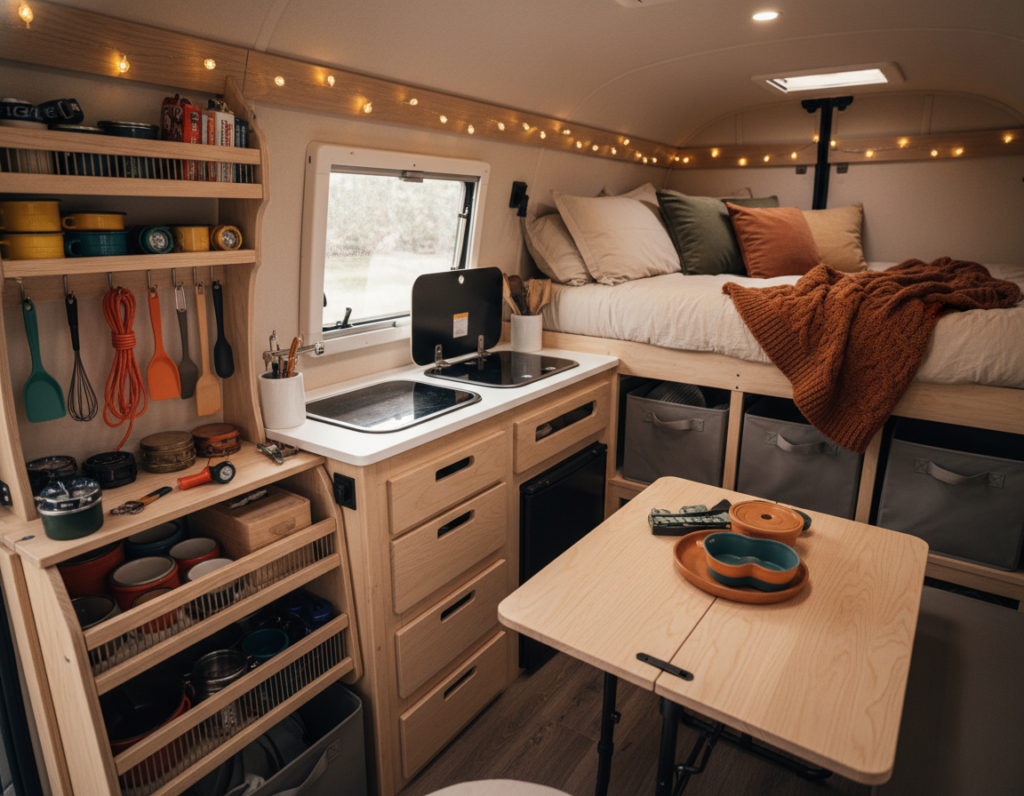
Creating a Functional Kitchen Area
A compact, functional kitchen makes the van feel livable from day one.
The author installed a $20 Sterling Oval Single Basin sink and a Koolatron 1.7 cu. ft. AC/DC fridge. These choices kept cost down and saved valuable counter space.
Plumbing the water system and mounting the fridge required careful measuring. Placing the sink near the side door created a dual-purpose area that also works as an outdoor shower.
“A reliable sink and a compact fridge make the kitchen a practical hub rather than just a box of gadgets.”
- Save counter space: the oval single basin frees room for prep and gear.
- Optimize layout: side-door placement eases water access and cleaning.
- Right-sized refrigeration: a 1.7 cu. ft. fridge balances capacity and power draw.
Each step of the conversion kitchen build demands attention to detail. Thoughtful placement of the sink and fridge keeps items organized and reduces wasted time on the road.
Optimizing Bedframe and Under-Bed Storage
A raised platform bed turns wasted under-floor space into the van’s primary storage hub. This approach makes the back of the vehicle work harder without adding cost or bulk.
Building Hinged Lids
Hinged lids on a platform bed give fast access to long, deep compartments. Lids can lift from the top or the side near the door to suit layout and time on the road.
The author used a Zinus Ultima Comfort 6-inch memory foam mattress and cut it into pieces. Those pieces doubled as a bed and a couch, so the top of the platform became a flexible seating and sleeping system.
Designing Accessible Cubbies
Divide the under-bed volume into cubbies sized for gear, food, and tools. Label each opening and use simple dividers to keep things from shifting.
- Place deep cubbies at the back for bulky items and shallow cubbies near the side door for daily use.
- Plan one section to hold the kitchen table so it stores cleanly and sets up fast.
- Use removable bins so small things stay sorted and move easily during a conversion build.
Tip: a well-designed bedframe with hinged lids and clear cubbies cuts search time and keeps storage efficient in a small van.
Implementing Smart Plumbing Solutions
A dependable water setup makes life on the road far less stressful and saves a lot of time.
He built a simple, reliable van water system using two 5-gallon containers tied together with braided vinyl tubing. A Valterra RP800 hand pump faucet served as the main outlet. This choice kept the cost low while delivering steady flow for cooking and cleaning.
Securing the pump and containers prevents leaks that could damage the interior. He strapped the tanks near the side door and under the sink to keep items organized and easy to refill. That placement also made outdoor top-ups fast.
Benefits:
- Reliable access to clean water for drinking and washing.
- Low-maintenance parts and affordable replacement components.
- Simple installation that fits most van conversion layouts.
Installing a compact pump system turned out to be one of the most essential things for true off-grid living.
Selecting Lightweight Furniture for Small Spaces
Lightweight furniture choices can transform how a small van feels and functions. Choosing furniture that balances weight, strength, and flexibility saves fuel and extends the life of the build.
Choosing Modular Ikea Pieces
The author favored Ikea components, notably the Besta Burs desk, because they are light, affordable, and simple to mount. The Besta Burs made a compact workspace that fit van layouts well and stowed cleanly when not in use.
Modular pieces adapt over time. Shelves can become a kitchen prep spot or a worktop, so a single item serves many roles. That flexibility saves space and reduces the need to swap heavy builds.
- Pick foldable tables that tuck against a side wall to free the main floor.
- Use lightweight desks like the Besta Burs for a dedicated top-level workspace that fits van constraints.
- Favor modular units so the kitchen and work areas change with needs without added weight.
Choosing lighter furniture cut build weight and saved time during installation. She avoided heavy wooden pieces that could break and instead used well-tested Ikea parts to fit van requirements and preserve usable space.
Installing Effective Insulation and Flooring
Good thermal barriers in the roof and floor are some of the highest-impact upgrades on a van. He chose Reflectix and Pure Safety R15 for wall and ceiling insulation to control temperature and reduce noise.
For the floor he used interlocking mats over a thin layer of closed-cell foam. The mats give cushioning, add insulation, and avoid the weight of heavy plywood.
Securing insulation in the ceiling and roof prevents sagging and keeps materials effective over time. He fastened Reflectix and R15 with adhesive and mechanical clips where possible to stop movement.
When the floor and ceiling work together, they form a thermal envelope that protects the side walls. This layered approach made the interior more comfortable at night and lowered heating needs during cold spells.
- Use Reflectix + R15 on walls and ceiling for balanced R-value and sound control.
- Install interlocking floor mats over foam pads to add comfort and insulation without bulky weight.
- Secure all roof and ceiling insulation to prevent sag—adhesive plus clips works well.
- Focus on roof and floor first to create a reliable thermal barrier for the whole van.
Managing Electrical Systems for Off-Grid Living
A reliable electrical setup turns a van into a true off-grid living space. She used a Goal Zero Yeti 1400 Lithium power station paired with 320 watts of solar to run lights, fridge, and devices without shore power.
Portable Power Stations
Portable power stations simplify complex installs. The Goal Zero Yeti 1400 acted as the core battery and inverter, which reduced the need for fixed wiring and cut install time.
Solar Panel Mounting
Mount solar panels on the roof with a plan that avoids unnecessary holes. Proper mounts and sealed cable entries keep the electrical system weather-resistant and long-lasting.
Wiring Safety
Organize fuses and breakers on the side of the van for easy access and monitoring. People who size the battery and manage power use over time stay off-grid longer.
- Tip: size the battery to match loads—fridge, lights, and chargers.
- Keep the roof wiring sealed to prevent leaks and unwanted holes.
- Label circuits and secure all connections to protect the electrical system.
“A well-planned power system reduces surprises and keeps trips on schedule.”
Adding Privacy and Window Treatments
He focused on two goals for windows: total privacy and reliable temperature control.
Blackout curtains hung on tension rods behind the driver passenger seats created an instant room divider. This setup gave the bed area privacy without drilling permanent mounts and kept the cab separate from the living space.
Custom Reflectix shades fit each window and cut heat gain in summer and heat loss in winter. They are light, inexpensive, and fold flat for storage when not in use.
Ease of use mattered: quick-release rods and simple fold-up shades saved time when securing the van at night. Proper window coverage also helps with air flow; opening the side doors or rear doors keeps fresh air moving while the interior remains hidden.
- Place blackout curtains behind the cab to separate living and driving areas.
- Make Reflectix shades to match each window for thermal control.
- Choose simple mounts so coverings deploy fast and stay secure.
Maintaining Organization on the Road
A small van stayed livable when each thing had a fixed home and a simple routine backed it up. He kept a short list of actions to follow after every use so items did not migrate around the interior.
Put things back immediately. After cooking or filling a water jug, he returned every item to its labeled storage spot. That small habit cut clutter and saved time when the road got busy.
Keeping the floor clear and the kitchen tidy reduced stress and made air flow better at night. Regular checks of the storage layout let him adjust ideas as needs changed.
- Make a quick nightly sweep to stow loose items.
- Track water use and top up tanks when convenient.
- Review the storage system each month to cut cost and wasted space.
“Organization was the key to sanity in a small space.”
With a reliable system in place, he saved time and energy and kept the van ready for the next trip.
Conclusion
Careful choices in layout and storage let people spend less time searching and more time outside. A well-planned van becomes a dependable home that supports travel and rest.
Focus on a practical bed layout and organized zones during the build. Small, budget-friendly projects save time and keep the sleeping area tidy. Treat the bed as a central element and design storage around it for fast access.
Transforming a vehicle into a cozy camper van is a gradual process. Whether sleeping in the back or enjoying views from the top, continual tweaks improve comfort. These tips aim to help you create a functional, lasting space for many adventures to come.