The Vansmith has helped hundreds of adventurers craft smarter rigs. In 2026, planning a DIY campervan bed setup starts with good decisions. A wrong choice can waste space and ruin sleep on the road.
Many people underestimate how complex a van bed can be. Poor weight distribution, ignored height limits, and missing storage plans cause costly reworks. This short guide points to common errors and easy fixes.
The article covers options from simple platforms to convertible seating systems. It shows how to fit water tanks, electrical systems, and mattresses without losing living area. Proper prep saves time and money during a conversion.
Readers will learn material choices, layout tips, and practical ideas for comfort and durability. With clear planning, the right platform keeps sleeping and seating useful for years of travel.
The Importance of Proper Van Life Bed Design
A smart camper van bed plan shapes the whole conversion. It sets how much storage, seating, and sleeping comfort the camper will offer each night. Class B RVs often arrive with a rear sleeping area, while cargo models like the Sprinter, Transit, and ProMaster give a blank canvas for a custom platform or convertible system.
Choosing a fixed platform or a convertible option comes down to trade-offs. Fixed platforms maximize storage under the mattress and simplify the build. Convertible systems free floor area for daytime living but add moving parts and daily work.
Practical points to consider:
- Measure interior height and wheel well placement before you commit to a build.
- Plan insulation and ventilation to protect foam mattresses and interior walls from moisture.
- Factor weight limits and cargo placement to keep the vehicle balanced during travel.
Professional builders stress that investing time in planning prevents costly rebuilds later. A thoughtful approach makes the camper conversion comfortable, durable, and suited to the owner’s travel style.
Ignoring Interior Height and Clearance
Interior clearance is a critical measurement that often gets skipped until the final fit. Many builders discover they have only inches of headroom after installing their mattress. That small gap makes sitting up in the sleeping area uncomfortable and limits daily use.
Headroom constraints
When plotting a camper van conversion, measure the total height from floor to ceiling first. Then add platform thickness and mattress height. Double-checking avoids surprises and costly rework.
Mattress thickness impact
Failing to account for mattress thickness is common. Using a high-quality foam mattress can save several inches and still offer comfort. Some builders found lowering a platform by 9 inches transformed the living area and made seating and sleeping functional.
- Measure platform plus mattress before cutting any wood.
- Balance storage height under the platform so it doesn’t block sitting upright.
- Consider thinner foam options as a strategic choice.
Failing to Account for Wheel Well Placement
Wheel wells often force a rethink of a sleeper platform’s footprint during a conversion. Their position changes where the platform can sit and how much usable floor area remains.
Proper measurement of wheel wells is a critical first step in any build. Use a tape measure and a level to map heights and widths. Mark these intrusions on your floor plan before cutting plywood or fastening supports.
A common mistake is assuming a standard mattress will fit. Wheel wells often push into the living area and make a full-size mattress sit uneven or crooked.
“Build your frame around wheel wells, not over them, to get a level sleeping surface every night.”
- The wheel well footprint dictates your platform bed layout and storage options.
- Consider boxing over wheel wells to create useful storage and a solid foundation for mattresses.
- Account for these structures early to avoid complex custom frames and wasted space down the road.
Result: a stable, durable bed that maximizes storage and keeps weight balanced for safe travel.
Overlooking Weight Distribution and Balance
Poor weight planning turns a smart conversion into a handling hazard on the road.
A heavy fixed platform with thick plywood and a full-size mattress can add hundreds of pounds to the rear axle. That extra mass changes braking, steering, and comfort for people who drive long distances.
Center of gravity concerns
Keeping the center of gravity low is essential for safe handling. Distribute storage and gear evenly across both sides. Avoid stacking heavy items behind the axle.
- Overloading the rear with a heavy platform bed and gear harms handling and safety.
- Use lighter materials like 80/20 aluminum framing or plywood with strategic cutouts to reduce mass.
- Balance bikes, water tanks, and tools so one side does not carry most of the load.
- Always total the weight of the mattress, storage, and items to stay under payload limits.
Result: a stable conversion that improves fuel efficiency and makes travel on winding roads safer and more predictable.
Choosing the Wrong Mattress for Your Needs
A mattress choice controls comfort, space use, and even the vehicle’s weight balance.
They should prioritize mattress type early in the build. Memory foam and latex rank high for support and durability in a campervan bed.
An 8–10″ memory foam mattress is a popular option for those who value sleep quality. It balances cushioning with enough firmness to prevent back pain on long trips.
Budget-conscious people can add a cut-to-size foam topper to improve a thinner mattress. Gel-infused foam is another slim, breathable choice and easy to trim to fit odd platform sizes.
- Measure space first: a larger mattress eats living area and storage under the platform.
- Choose breathable covers to reduce condensation and keep sleeping surfaces dry.
- Test for support: proper firmness prevents aches after travel days.
Research mattress types and match them to sleeping position and the conversion’s weight limits. A thoughtful mattress choice leads to better rest and a more usable camper space.
Neglecting Ventilation and Airflow
Poor airflow is a quiet problem that ruins mattresses and corrodes storage over time. Proper ventilation prevents moisture buildup and keeps sleeping areas healthy during travel.
Preventing moisture buildup
Neglecting ventilation can cause mold and mildew that damage mattresses and stored gear. People often miss that the space under a platform bed needs to breathe to avoid condensation.
Airflow under the mattress
Use slats, modular panels, or mesh supports to create continuous airflow beneath the mattress. Leaving gaps in plywood or adding an under-mattress mat creates a small air gap that stops trapped water and odors.
- Health risk: Mold harms occupants and shortens mattress life.
- Storage protection: Airflow keeps gear dry and usable.
- Simple fixes: slats, perforated panels, or breathable mesh bases improve circulation.
- Build tip: plan gaps or removable panels to inspect for moisture over time.
For more real-world pitfalls and pro tips on conversion planning, see the guide on conversion mistakes.
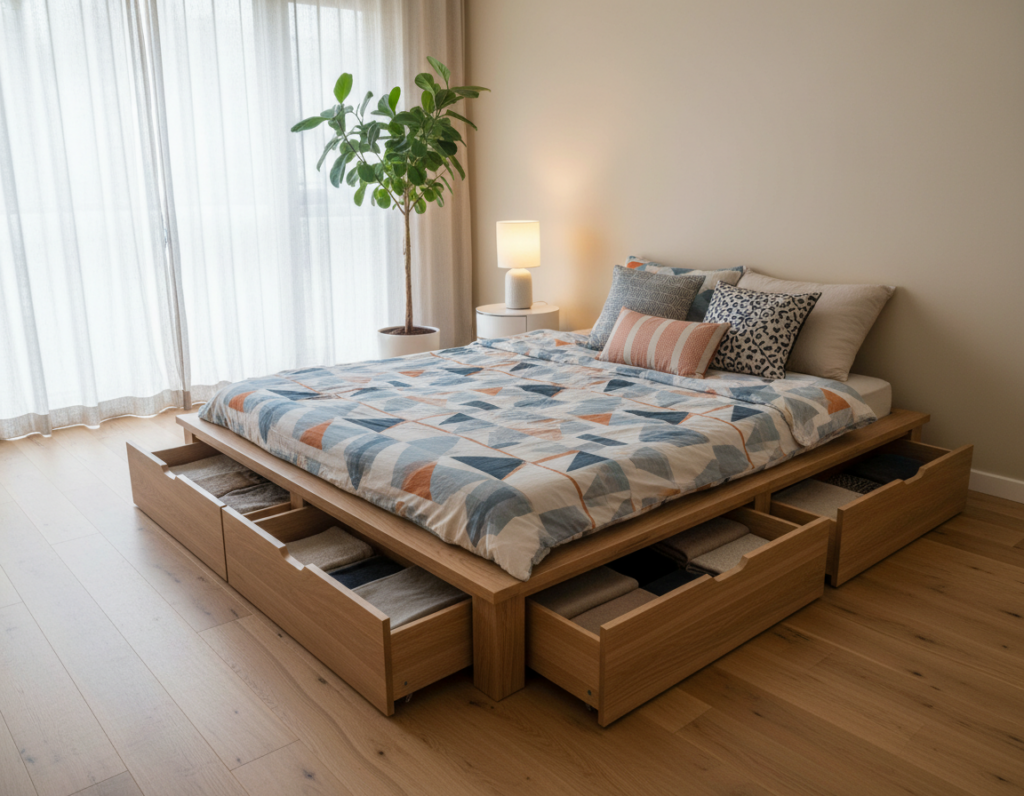
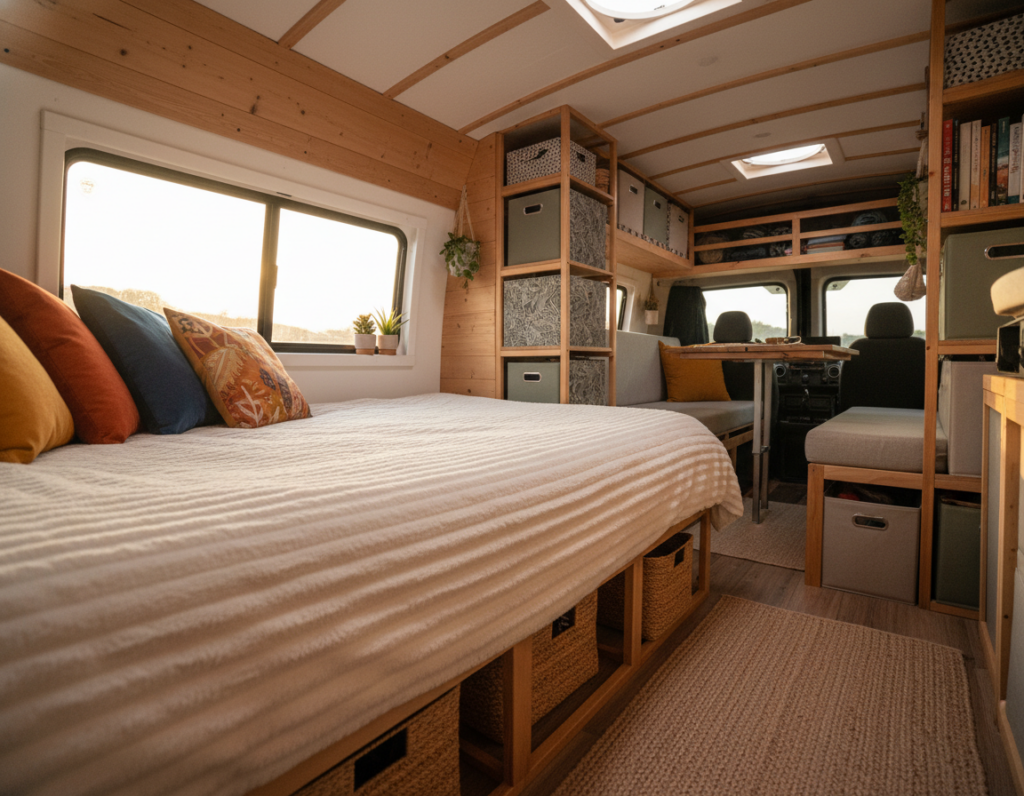
Miscalculating Storage Requirements
Underestimating how much kit needs a dedicated spot is one of the fastest ways to turn a camper into chaos. A fixed platform often delivers the largest storage underneath, so many people choose it to stash bikes, a refrigerator, or water containers.
They should measure total vehicle length — conversions can reach up to 189 inches — and decide how much of that area is for sleeping versus storage. If a convertible option is selected, expect to trade some storage for daytime seating and movement.
Inventorying gear first avoids surprises. List tools, cooking gear, spare parts, and clothing before cutting plywood or fixing the platform height.
“A thoughtful storage plan makes the living area feel larger and keeps essentials ready for travel.”
- Use modular bins or labeled drawers under the platform for fast access.
- Reserve a few inches of clearance to accommodate mattresses and foam toppers.
- Plan cabinetry placement so heavy items sit low and centered for balance.
Underestimating the Complexity of Convertible Systems
Convertible sleeping systems demand more daily attention than many builders expect. What seems like clever space saving often means nightly setup. That routine can wear on people who prefer simple living.
Daily conversion fatigue appears when a dinette needs cushions moved, a table cleared, and mechanisms aligned each evening. Murphy beds and slide-out sofas look neat, but they need precise carpentry and sturdy hardware.
- Many forget the nightly tasks and tire of repeated changes.
- Complex moving parts demand testing and occasional maintenance.
- A fixed platform is often the better option for those who value comfort and speed.
Practical tip: prototype the mechanism before committing to a full build. Test how long setup takes and whether the action strains the back or hands. A simple, well-built system usually beats a fancy one for long-term comfort and storage use.
Forgetting About Future-Proofing Your Layout
A forward-thinking layout keeps a camper usable as needs shift over time. It avoids tearing out a platform when people add a partner, pet, or new gear.
Choose flexible systems that can expand. A convertible or modular campervan bed lets a solo traveler add a second sleeping area without a full rebuild.
Plan storage with removable bins and rails so the space adapts. Leave access points under the platform for extra electrical outlets or plumbing later.
Think about growth: reserve a few inches behind walls for wiring or tanks. That small allowance saves time and money when upgrading heating, water, or charging systems.
“Design flexibility up front prevents expensive retrofits and keeps the camper useful as travel needs change.”
- Build modular storage that can be reconfigured.
- Pick a platform option that can widen or shorten for different mattresses.
- Include access panels for electrical and water runs.
- Test seating and sleeping transitions before finishing surfaces.
Result: a practical van build that grows with travel, keeps comfort high, and protects investment over time.
Poor Material Selection for Bed Frames
Material choice defines how long a frame lasts and how it affects handling on the road. The wrong pick adds weight, squeaks, and extra work down the line. Select materials that match the intended use, moisture conditions, and payload limits.
Plywood pros and cons
3/4″ birch plywood is a popular option for a camper van platform. It balances strength, looks, and sustainability.
It is easy to cut and finishes well. Builders should seal edges and test for moisture resistance. Untreated plywood can swell if condensation collects under a mattress.
Aluminum framing benefits
80/20 aluminum saves weight and resists corrosion. It is modular and easy to customize for storage and platform attachments.
Aluminum frames cut down overall mass and improve fuel economy while keeping the sleeping area stable.
Steel structural considerations
Steel is ultra-strong but often heavier than needed for most camper builds. It can be good for heavy loads or long-term commercial use.
For many people, a mixed approach shines: aluminum or steel for the base and plywood for the top to balance cost, comfort, and durability.
“Investing in the right materials up front prevents repairs and ensures the platform stays stable and quiet for years.”
- Consider moisture resistance and sealant for wood parts.
- Test a small mock-up to check for squeaks and fit.
- Choose materials that keep weight low while supporting storage and mattresses.
Lack of Access to Electrical and Plumbing Systems
Failing to plan access to electrical and plumbing can turn a small fault into a multi-hour teardown. A camperbed platform that blocks systems forces people to dismantle cushions, panels, or the platform itself to reach batteries, inverters, or tanks.
Always include removable access panels or hinged sections in the platform. These give quick reach to wiring runs, fuse boxes, and water fittings without destroying finishes.
Practical steps:
- Route electrical lines along a wall channel so outlets and switches are reachable.
- Place tanks where access panels open directly to them for easy inspection.
- Use lift-up platforms or hinged storage to combine comfort with serviceability.
Result: a platform that protects systems and saves time on the road. Planning plumbing and wiring before finalizing the build prevents late-night repairs and keeps travel stress low.
“A well-planned platform integrates systems so comfort and maintenance coexist.”
Disregarding Sleeping Direction and Orientation
Sleeping orientation changes how people use every inch of interior floor space. Choosing a north-south or east-west layout affects entry, storage planning, and how comfortable two people sleep side by side.
North-south pros: this orientation lets couples slide in and out without climbing over each other. It also keeps the platform simple and makes room for storage under the foot and head areas.
East-west pros: rotating the mattress across the width can free useful floor area for seating, a small kitchen, or extra storage. Dodge ProMaster owners often take advantage of extra width to fit a standard mattress east-west without trimming.
Trade-offs to weigh
Measure interior width and mattress size before committing. If a person is over 6 feet tall, north-south avoids toe crowding. For shorter occupants, east-west may be the best option to maximize seating and floor area.
- Disregarding orientation can reduce comfort and make access awkward.
- East-west may require flares or bump-outs on narrower models like Transit or Sprinter.
- North-south supports easier entry and less nightly disruption for couples.
Practical tip: mock up your mattress footprint with cardboard or foam before finalizing the platform. That quick test reveals how seating, storage, and walking paths will function in daily use.
“Orientation is a small decision that changes how the whole conversion works during travel.”
For more build resources and layout ideas, check the van build series.
Skipping Soundproofing and Insulation
Good insulation does more than trap heat — it creates quiet, consistent conditions for rest on the road. Without acoustic and thermal layers, sleep suffers and the sleeping area feels less private.
Skipping soundproofing makes traffic, generators, and nearby noise much louder. Many people report worse sleep when they ignore damping on the walls and floor.
Proper insulation also stabilizes temperature year-round. A well-insulated platform and ceiling keep the mattress area warmer in winter and cooler in summer.
Practical steps: insulate walls and the ceiling before fixing the platform or cabinetry. Add sound-deadening mats under flooring and choose materials with good acoustic properties.
- Sound-deadening mats cut road noise for better rest in urban or roadside spots.
- Perforated panels or foam with air gaps improve airflow and reduce echoes.
- Plan access panels so insulation does not block future checks to wiring or water tanks.
“Investing a little time and quality insulation pays big dividends for comfort and sleep on the road.”
For detailed material choices and an insulation guide, they should consult a focused resource before the final build.
Ignoring the Need for Comfortable Bedding
Good sleep starts with the right sheets and pillows, not just a firm platform beneath them.
Comfort matters: even a high-quality mattress can feel wrong if covers trap moisture or sleep heat. Breathable, moisture-wicking fabrics help regulate body temperature and cut clamminess during the night.
Smart pillow choices save space and improve rest. Compact down or synthetic pillows made for RV use compress for storage yet support the neck when sleeping. Heated mattress pads are a useful option for colder travel and add a touch of luxury when needed.
Blackout curtains make it easier to sleep in bright cities. Choose sheets and blankets that wash easily and dry fast. That keeps the sleeping area clean and reduces odors from outdoor trips.
“Investing in quality bedding is the simplest upgrade that changes every night’s comfort for people on the road.”
- Pick moisture-wicking covers for temperature control.
- Use compact pillows to save storage space under the platform.
- Favor washable, durable textiles to keep the camper fresh.
Failing to Measure Twice Before Cutting
A tiny measurement error often grows into a big problem once the platform is bolted in place.
Following the old rule, measure twice, cut once saves money and time during a camper build. They should test-fit pieces before the final cut. A cardboard template helps check mattress fit, storage access, and seating flow.
Support beams must be placed every 16–18 inches for reliable strength. Use a quality tape measure and a level to confirm squareness. Double-check dimensions around wheel wells, electrical panels, and water runs so the platform does not block service points.
- Mock up the frame with cardboard or scrap wood to validate size and clearances.
- Confirm mattress footprint and storage door paths before fastening the platform.
- Re-measure after installing insulation or wall panels — thickness adds inches.
Tip: a precise build looks cleaner, sleeps better, and avoids wasted materials on a second cut.
Conclusion
A clear plan and a few simple checks keep a campervan bed project from becoming a costly redo.
Design carefully, mock it up, and test access to systems before final assembly. This saves time and keeps weight balanced. It also protects storage and ventilation choices that matter every night.
They should weigh options between a fixed platform and a convertible system based on daily use, not trends. Prioritize comfort, airflow, and service access so maintenance stays simple on the road.
Final note: thoughtful planning and small prototypes turn ideas into a durable, comfortable campervan that supports travel and rest for years.